Pipes Result – Monster
On Saturday I wrote a post about my ideas for using a couple of giant pipe segments in a conceptual photo. I ended up having a couple of lovely friends Francisco Graciano and Eran Bugge come over and play the roles of savior and damsel. Here is the result (Click to enlarge):

As you can see it ended up a bit differently than I had originally planned (as things like this usually do). First, I gave up on the caving idea, no exciting enough, plus I couldn’t get my hands on the equipment I’d need to make it believable anyhow. That’s when I came up with the idea of them running from the imagined jaws of a cthulhu-like monster from beneath the ground.
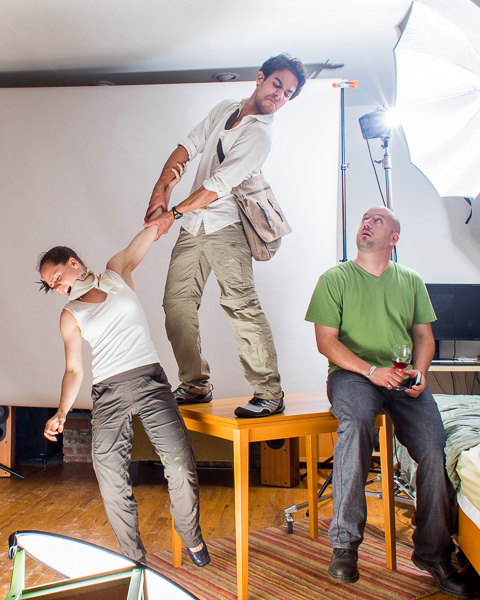 The first thing I had to do was move the pipes and gravel pile to a more desolate location, so I co-opted a landscape I took on the salt flats at the bottom of Death Valley at dawn. Much better. Cisco and Eran showed up and we shot about 30 pictures of them if various forms of the pose with Cisco standing on the edge of a table (with my friend Guillaume serving as a counterweight. As you can see I had a soft light from below blasting them to match the light from the pipe, plus one behind to rim light Cisco a little bit. There was also another strobe next to the camera bouncing off the wall to give some overall illumination to the shadows that the other two lights caused.
Compositing the two together was the hard part, along with the random science photos of tentacles. That stuff took a couple of hours. Cleaning up the masks on each element, playing with curves to try to get the contrast and brightness to match between layers.
I posted a version on facebook and G+ last night at around this point. I knew normally I’d spend another hour or two playing with it to really polish things up, but I was tired so I went to sleep. This morning however I added the final touches. Smoke coming up from the pipes, a minor lens flare or two, a lightning bolt, plus a whole lot more 1 or 2 pixel clean-ups.
Is the end result believable? Well it is a giant underground octopus attacking my friends in the middle of Death Valley so let’s be reasonable about the answer to that question. That said, I think it’s successful and silly, and a lot of fun. It ended up very different than I originally intended, but also much better. Not bad for a weekend project.
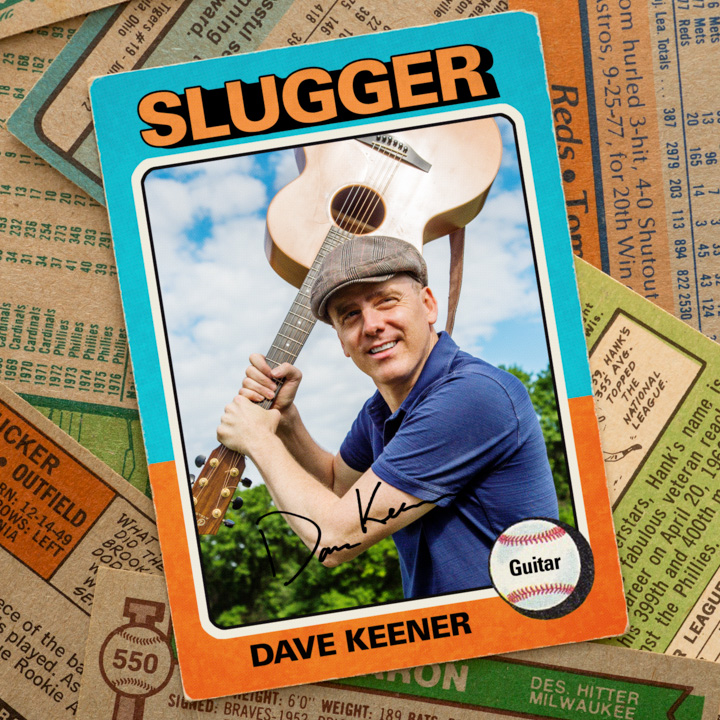
“Slugger” Cover
So my good friend Dave Keener asked me to help shoot and design his new CD cover, and I excitedly obliged since I had done the same for his previous album called The Easy Way a couple of years ago. The record was going to be called “Slugger”, so I thought it would be fun to stick Dave in baseball card. The problem is, of course, that baseball cards are rectangular and covers are square. So the question was how to convert a rectangle to a square?
In the end I decided to make Dave’s card just one in a pile. Luckily I have a small collection of old cards that I shot as a background with a speedlight bouncing off the opposite wall, even shot a card on top (It was a signed Reggie Jackson!) to use for it’s slightly beat up edges. I also made Dave’s picture match the old school original by applying a color halftone screen to make it look like it had been printed (see below). It’s the details that count, right?
The music is great by the way, it’s available for download on July 4th. Here’s the Amazon MP3 Link. I got to play some piano and organ on it to boot!

Hadouken Behind-the-Scenes
I made a little BTS video for my Hadouken shoot from a few weeks ago.
Frame Your Photographs the Right Way
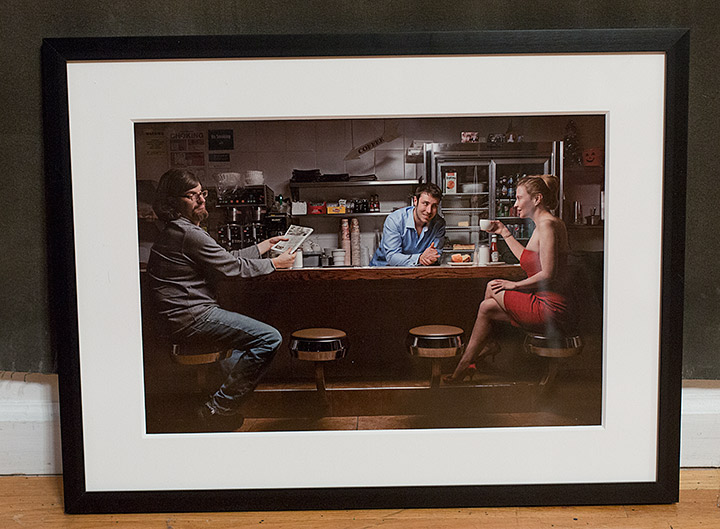
I shot the photograph above about 2 years ago at the beginning of 2011 in the diner up the street from me. It feature the actual proprietor Nick, hitting on a a beautiful woman in a red dress played by my lovely partner Heather. And of course, my friend Claude looks on in disgust from the other end of the counter. I had been meaning to bring Nick a print to put on the wall ever since I shot the picture, but it just kept getting pushed down my to-do list. So I finally printed out an 13×19″ print on my favorite Red River Ultra Pro Satin paper and then promptly let the whole thing go back to the back burner again for a week when I realized that I’d have to order a frame. However, I just remembered that I already HAD a frame I could use.
A few months ago when we were doing some promotional work together for the podcast, Frame Destination sent me an sample of what they could and I had it in my closet waiting to decide on a print that was worthy of it’s loveliness. So I said, ‘screw it’ and decided to use the frame for the diner print I was giving to Nick.
Frame Destination will custom cut frames of almost any size from very high-quality materials. Basically it’s the same or better quality than you’d get at your professional local framer, but for a fraction of the cost. Really top-notch product. I’ve used them to frame my Drabbles show at SoHo Photo a few years ago, and it saved me a bundle. The catch is that you’ve got to mount the print in the frame yourself. Static electricity and dust can be a real nightmare at times, but nothing a reader of this site can’t handle. It was also the first time I had used the non-glare plexi instead of glass it I have to admit that it looks beautiful.
For those who are wondering, here’s the parts list for the above frame:
Nielsen Profile 97 – Matte Black 21 (Anodized) – 18×24
Plexiglas® Non-Glare Acrylic 1/10” – 18×24
Alpharag 8-Ply – White 8660 – 13×19(18×24)
Foamboard Acid Free Artcare 3/16 inch – 18×24
So take this a reminder to print, mount, and hang some of your work so other people can enjoy it for years. If you decide to place and order with Frame Destination, try using the coupon code OTP at checkout and I think you might still get a few bucks off… It’s certainly worth a try.
Behind the Scenes of the Snow Angel Diptychs
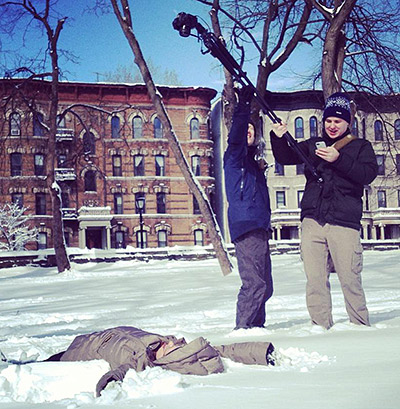 Some people have asked me how I shot the snow angel diptychs from yesterday, so I thought it’d be easier to show you. Don’t worry, it’ll be a short post as it wasn’t a fancy setup at all.
Basically I had to find a way to get the camera up above the subjects. So either I had to go up with the camera on a platform or ladder of some kind, or I had to have a way to remote control it from below. Setting up ladders and platforms is generally frowned upon in NYC parks and I had to do this on the down-low anyway, so I settled on the second option.
First step was to find some sort of arm to stick the 5D Mark III camera and 28mm/1.8 lens at the end of. I opted to use my carbon tripod and ball head with the legs together but fully extended. This gave me about 4 or 5 feet of distance. If I anchored the feet of the tripod in my stomach, I could then use my arm to control the angles. Then the question became how to fire the shutter. My last ditch option would be to use the built-in timer and then have to get the camera in position before the camera fired. This would suck. Next up was a little cheap IR remote I bought on eBay, but I found that I couldn’t control the camera angles enough to get an accurate framing. It worked, but it didn’t work very well. Luckily I had a trick up my sleeve.
A couple months ago I was sent a CamRanger from the manufacturer to try out. I’ve been meaning to send it back to them, but I had yet to find a real life portrait shooting situation for which it was suited. Something to actually run it through it’s paces on a real shoot. Well I found one today. So the Cam Ranger plugs into the camera body (I taped it to the tripod toward the top of one of the legs) and connects via wifi to your iPad or in my case iPhone (The iPad would have been too heavy). It allows you to not only fire the shutter and change exposure settings from afar, it also lets you stream liveview images from the camera to the phone. Basically full remote control. So I could have the camera up at the end of the tripod over the people and still see everything the camera saw. Firing the shutter when I had things framed just right. I have to admit that it worked flawlessly, and I have not generally had a trouble-free experience with Canon remote control even using their own software and an actual computer with a hardwired cable. Color me impressed.
As for lighting I had planned and brought some pocketWizards and a strobe with a little softbox to use, but ended up just using the hard sun as it was. It made the whole thing feel more real.
Below is a very rough video of the whole thing in action.
Video courtesy of my friend Patrick DiJusto whom you should follow on twitter.
Photo courtesy of the lovely Eran Jones.
[youtube 7l2iBxrX9NU Snow Angel BTS]
Underneath by Jes Young Book Cover – Behind the Scenes

About a year ago I wrote a post for the cover of the first book in this series entitled “Tab Bennett and the Inbetween”. That cover was a serious composite too, and because I never did get around to writing it up for the blog I thought I’d take the time to let you all behind the curtain for the making of the second one.
I should point out that Underneath, Princess of Twilight & Dawn will be out in the Amazon Kindle book store on December 30. I’ll be sure to update the post and let people know where they can get it.
The author Jes Young and I sat down and talked through some ideas for the second book. Just to get you up to speed in case you haven’t read the first book (which you should, here’s the ebook on amazon), the main character Tab was a young woman whose sister had died and is just learning the truth about who she was, which happened to be an elf princess with a destiny. On the first cover we visualized a scene out of the book where she’s walking from her house toward toward an apparition in the woods at twilight, and starlings are flying around over her head.
For the second, somewhat darker book (think The Empire Strikes Back), Tab is journeying down into an underworld to confront her evil father. We thought that a downward spiral staircase would be a great visual since it is a significant part of the story line. Tab would be dressed a big sexier, be a bit more badass, and be holding a bladed weapon of some kind. I liked the idea of making her pose similar to the first cover, with Tab walking down the steps, but looking back over her shoulder for danger. It would bring some continuity to the series.
The first challenge for this project was to find a spiral staircase. It’s a surprisingly difficult thing to do. But Jes (or course) has a friend who happens to own a castle, Osborn Castle at Cat Rock up on the Hudson to be specific. So in the fall, I took the train up with camera to shoot scenes and elements which I could later mix together for a background plate on which to build the composite. I’d like to take this moment to say that this place is BEAUTIFUL and a special thanks goes out to Fred for being so gracious and letting us use his property.. So if you’re fancy and looking for a place to have your wedding or similar gala party, then Cat Rock should be on your short list. Fred was kind enough to give us a tour of the grounds and the house. When we mentioned staircases, we were told there was one off limits to the public up on the third floor. As it happened, it turned out to be perfect for what we needed. I set up my tripod at the top and took this picture. It’s severely wide-angled (28mm) and I know that the perspective is going to be exaggerated, but I’m ok with that because it will just add to the intensity of the final result.

Pretty boring right? Too bright, cheery, and far too clean for what we needed. That’s ok, I can deal with that in post. The important part is to capture the crazy meandering stairs.
What I needed was a way to grunge it up a bit. Sometimes, taking pictures of uninteresting things can be a real lifesaver, case in point: I had a picture in my library of an old plaster wall whose paint was cracking and flaking off. It looks like this.

I used this detail stretched across the original stair shot in overlay blending mode, which made the two appear to merge into one foreboding stairway into the unknown. Here’s what that looked like.

Simple, right? Well it kind of is. It may not be perfect, but because we’re going to do so much more to this composite before we’re finished, it’s ok for the moment. The next step is to make scene darker and creepier, and make the lighting far more blue than the original shot. In addition, I wanted to sculpt the light a bit to give the impression of a final window with dusk or moonlight coming in from left to right.Jes had also requested that we bring in the birds from the cover of book one, so I added that detail in. That leaves us with this:

Notice that there are some lighter areas in the middle, that’s where I am planning to add the model. Thenext step was to get my friend Mary to model as Tab. I pulled out some blue paper to make it easier to mask her out, set up a couple lights (one for fill and another to mimic the light coming in the window), and set up a box to act as the step for Mary to stand on so that her feet and positioning matched as much as possible.

You can see that I didn’t have a sword for Mary to hold. I couldn’t get it in time, so we had to make due with a small umbrella as mock sword hilt. I was happy with her expression and the angle of her body, but we added some later shots which had much more dynamic hair, so that it would look like she was whipping her head around because she heard something behind her. So-(delete) I looked through the shots and composited the hair from a later shot onto this one. Here’s a crop of the hair shot.

Now it was time to bring Mary into the background. I actually-delete had pretty-delete decent luck using a mask and the built-in refine edges commands in CS6, which surprised me because they have rarely worked for me in the past. So-delete Here’s Mary against the plate, with and without the shadows. Look around her feet on the shot on the left and you’ll see how pasted in it looks. Matching shadows and light are the key to making shots like this work.

The next challenge of course, was the issue of the sword. I had a prop sword which I shot and masked out and placed into the scene, but it didn’t quite jibe. Rather it was fine, but it didn’t have enough pizazz or magic or something. So I gave it a bit of a glow and a little specular/spectrum?? highlight to bring more attention to it. Here’s the before/after:

Much better. The only thing left to do was to add a bit of vignetting to make Mary stand out and make the whole shot look more claustrophobic. I also added the grunge border I used on book one; yet another element of consistency between the two to give them continuity. Oh and last but not least istype/font, again I used the same style I developed for the first book. So, without further ado, the final cover for Underneath by Jes Young looks like this:
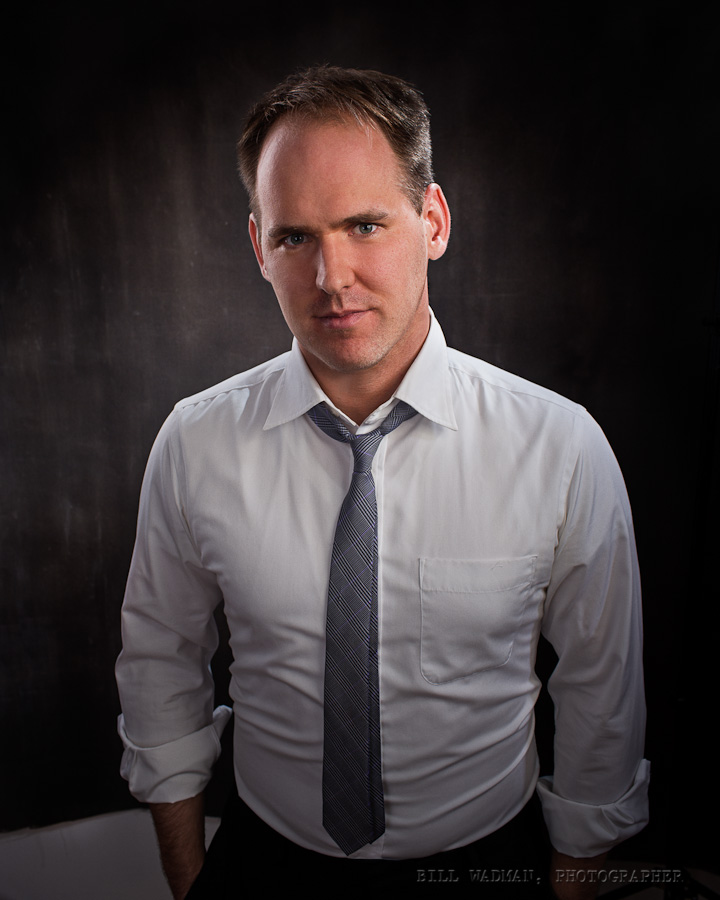
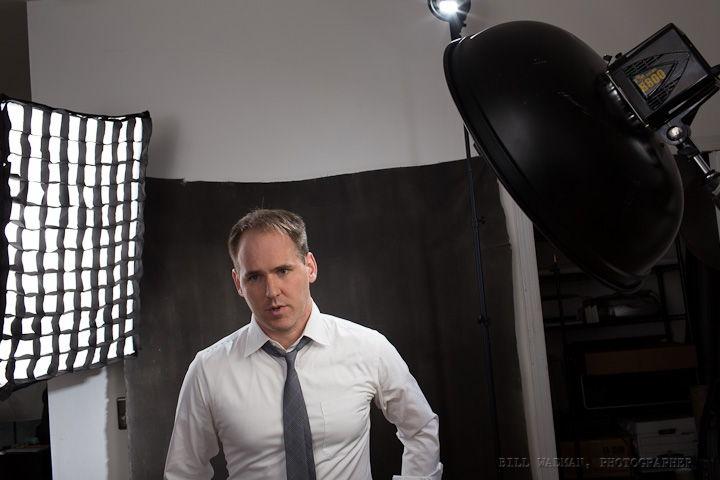
New Quasi Self-Portrait
I needed some new photos of myself. So I setup some lights and had my friend Claude come and man the camera. As you can see, he did a great job as photographer.
Mostly I’m sharing this so that you can how easy it is to end up rocking a 5 light setup. (1) head pointing toward the back wall for overall fill, (1) head with a gridded beauty dish for key camera right, (1) head with gridded softbox camera left for rim, (1) head with 20 degree grid on the background, and (1) speedlight with a makeshift snoot as a little hair light from behind and above.
Oh ya, and a 35mm prime lens. Long lenses for portraits can suck it. Process shot below as well.
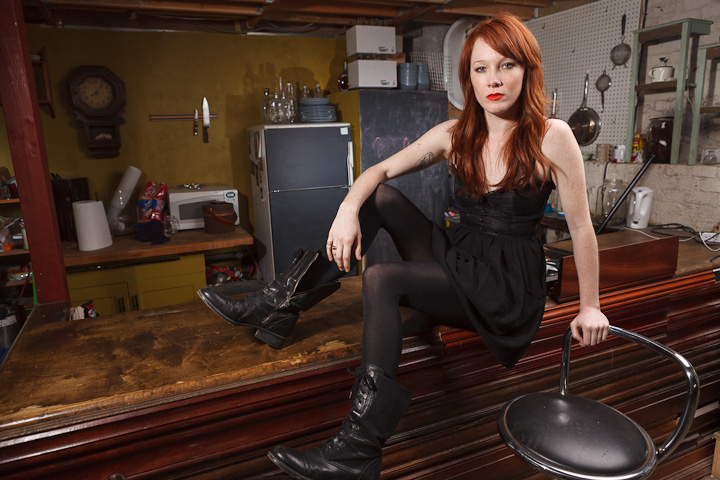
One Raw File, Two Visions
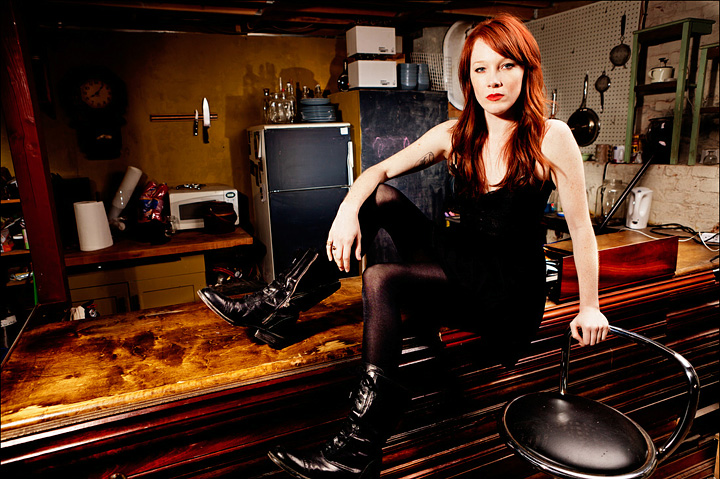
Geoff Greene was one of the photographers at my lighting workshop a couple of weeks ago where he took a picture of our model Mary sitting on the bar in the back of the room. A couple of lights, not a whole lot of set design as you can tell. Anyway, Geoff sent over his version of the image along with some post-processing comments and I thought it would be interesting to show what two different photographers would do with the same RAW image from the camera. So I had his send it along and here are the results.
So here’s the original exported straight from Lightroom:
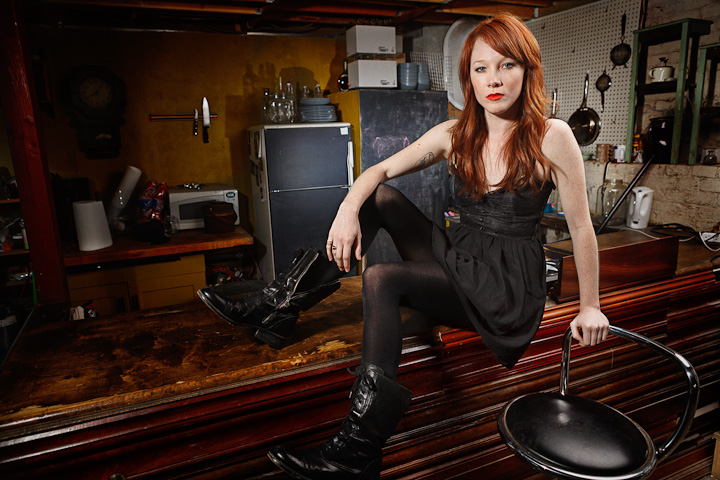
Then here’s the version Geoff sent me. High-contrast, high saturation, and very ‘fashion’ to my eye:
And finally, what I would have done with it if it were my picture. Not as drastic, closer to the original, but still trying to pull something more out of the RAW data by highlighting Mary a bit. In comparison, mine looks really boring and conservative.
I’m sure if we gave it to 10 photographers we’d get 10 varying versions of the image. Just goes to show how much post-processing is part of the process. We may have gotten rid of the chemicals, but you’re still not done when you press the shutter release.
Simple Tips To Dramatically Improve Your Photographs
“How can I take better pictures?” is the one question I’m asked constantly. Usually by people who just recently moved up to an entry model digital SLR with a kit lens. Like a kid who has found their father’s gun, they have the tools, but they don’t have the experience to use it properly. It’s a dangerous scenario. Don’t worry though, taking better pictures isn’t that hard, and there are some really easy steps you can take that should improve your game immensely without a lot of effort.
1. Get Out Of The Sun
 Anywhere under direct sunlight is a terrible place to take pictures. It generally creates very high-contrast images with ugly shadows and squinting subjects. These are things you should avoid. So if you’re outside and need to take pictures of your friend for instance, what do you do? You do what Richard Avedon did, move into the shade. In the middle of the day there is plenty of soft, indirect sunlight in the shade of a building or under a tree. This is perfect, wrap-around light for portraits that you can’t really replicate even with thousands of dollars of studio gear. Believe me, I and many people before me have tried. The universe gave you a perfect studio, use it.
Unless you’re an expert, avoid direct sun except for the so-called Golden Hours after sunrise and before sunset when the sunlight is diffused through more of the atmosphere and closer to the horizon so it’s coming from the side instead of from the above.
(Intermediate Tip: If you absolutely must work in the middle of an open field, do yourself a favor and bring a diffuser. A diffuser is just a panel of translucent fabric that breaks up the hard light of the sun and transforms it into softer indirect light. A 5-in-1 reflector/diffuser is the next purchase after the camera, it’s just amazing how many things you can do with this simple tool.)
2. Simplify, Get Closer
Robert Capa used to say, “If you’re pictures aren’t good enough, you’re not close enough.”
Granted he was a war photographer and a little bit crazy, but it’s a maxim that works for taking pictures of people and places as well.
Most pictures don’t work because they’re too cluttered with other things. Distracting backgrounds, other people, or simply too much distance between the photographer and the subject. Simplify the composition of the frame by getting closer to the subject either by zooming in (no ‘digital’ zoom though, that stuff is just terrible) or by getting physically closer. As I’m fond of saying, “Zoom with your feet”.
I’ve found that getting closer to my portrait subjects also has the ancillary benefit of making them open up to the camera, assuming the lens isn’t right in their face. When your subject is closer, you feel less like a sniper and more like another human being.
3. Camera Handling
Today’s hi-tech cameras are admittedly pretty amazing, and while they may seem like it, they’re not yet capable of taking the pictures themselves. That’s where you come in. Very few amateurs I see have good camera technique. Follow these basic guidelines and you can increase your odds of getting sharp accurate shots. It’s not a difficult skill set to acquire, but more a matter of mindfulness; like learning to hold the steering wheel at 10 & 2.
There was a National Geographic special a couple years ago about President Obama’s staff photographer, Pete Souza. While the whole show is great, what fascinated me most was watching how Pete held his camera. He was master of this stuff and it was obviously second nature to him. Even the big boys master the fundamentals.
First things first. Spread your feet a little and straight up so that your hands have a good platform to work from. Think of yourself as a walking talking camera tripod, or bipod more accurately. Next, keep most of the weight of the camera in your left hand. On a SLR style camera this usually means cradling the camera in your hand from underneath near the junction of the camera body and the lens with your thumb and first few fingers wrapped on either side of the lens. This keeps the camera from bouncing around when you press the shutter. Work on holding the camera steady this way, as if you’re a waiter and the camera is a tray full of drinks.
And the biggest technique mistake I see people make is that they press the shutter with such force that the camera shakes, the result being blurry pictures. This is especially true if you’re taking pictures indoors without a flash (which you should try to master by the way; these shots look better than the flat bright pictures you get with on-camera flash). Practice pressing the shutter without moving the camera (The stable left hand underneath should help). Also try half-pressing the shutter to lock focus and exposure. That way when you actually want to take the shot, the shutter will require only a tad more pressure and will be nearly instantaneous. Most of all become deliberate and conscious of what you’re doing. Eventually this will become your natural way to shoot.
4. Edit Down Your Pictures
By far the biggest mistake amateurs make is that they don’t edit down their pictures. I recently had to look through 1262 pictures from a family member’s vacation. I wanted to see their pictures, but I would much rather have seen only 100 of their best. Editing is what art is all about. As technology allows us to make more content for less, this becomes even more true. When you only had 36 frames on a roll of film you were much more careful about each shot. Now it’s a free for all.
For every image in my portfolio I may have taken hundreds of images. They weren’t all the same of course, but that’s where editing comes in. A photographer makes artistic decisions about which are the best pictures, and so can you. Go with your gut. Trust yourself, and do it in stages. First cull the bad pictures, then choose the best from each set of similar shots. Just by doing this you’ve probably got your images down to 1 in 4.
I personally then do one more round where I choose the pictures I wouldn’t really wouldn’t want to lose if my house burns down. That’s the set that I show to people. Not only will they thank you for not putting them through hours of monotonous shots, but since you’re only showing them your best they’ll think you’re a better photographer to boot. You’re only as good as the worst shot in your portfolio. They don’t need to know about the stinkers.
—————–
So there you have it. Four quick tips that’ll make your pictures better overnight. Well maybe not overnight, but if you follow my advice and practice a bit, you’ll certainly put yourself ahead in the pack. Be careful though, pretty soon you’ll start getting requests to shoot weddings for friends. Trust me, run.
Setup Notes on the December Portraits (Part 3 of 3)
Part 3 of the ‘behind the scenes’ notes from my December Portrait series. Here are parts One and Two if you missed them.
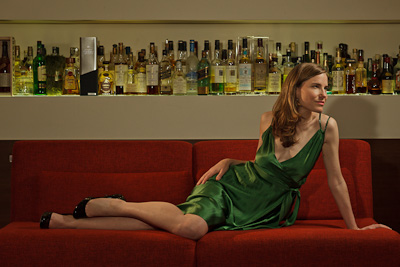
21: Minx
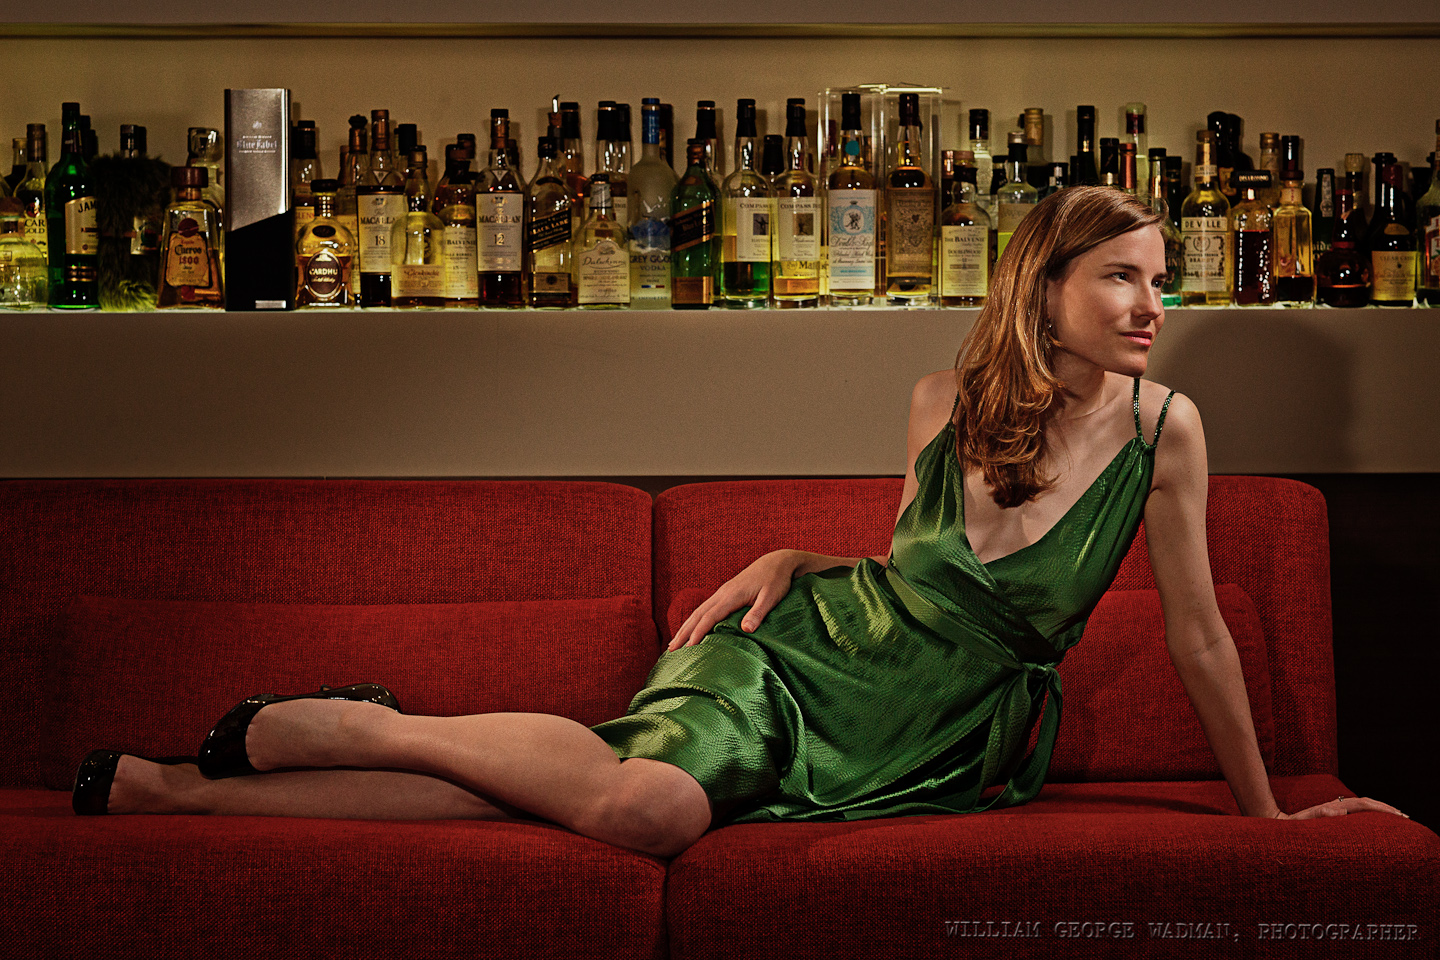
Pretty basic setup. Three speedlights. One up and to the right of Charity as something like a key light. Another slightly behind to her left and the last next to the camera for fill. Overall not too difficult to shoot a pretty lady lounging on a couch. Slight crop and light shaping in post.
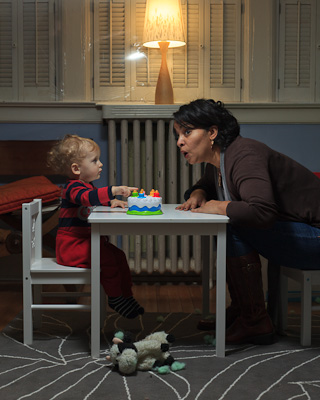
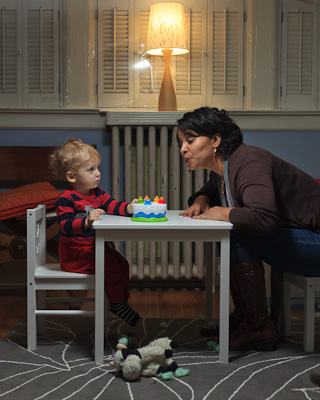
22: Birthday

One of my favorite in the series. My friend Kecia on the evening of her birthday sitting and blowing out candles on a toy birthday cake with my adorable nephew Bert. Not the kind of thing you can make an 18 month old do. Luckily he was interested enough to sit down and play with Kecia for the 30 seconds it took to get the shot. Composited together a shot of him and one of her in the end.
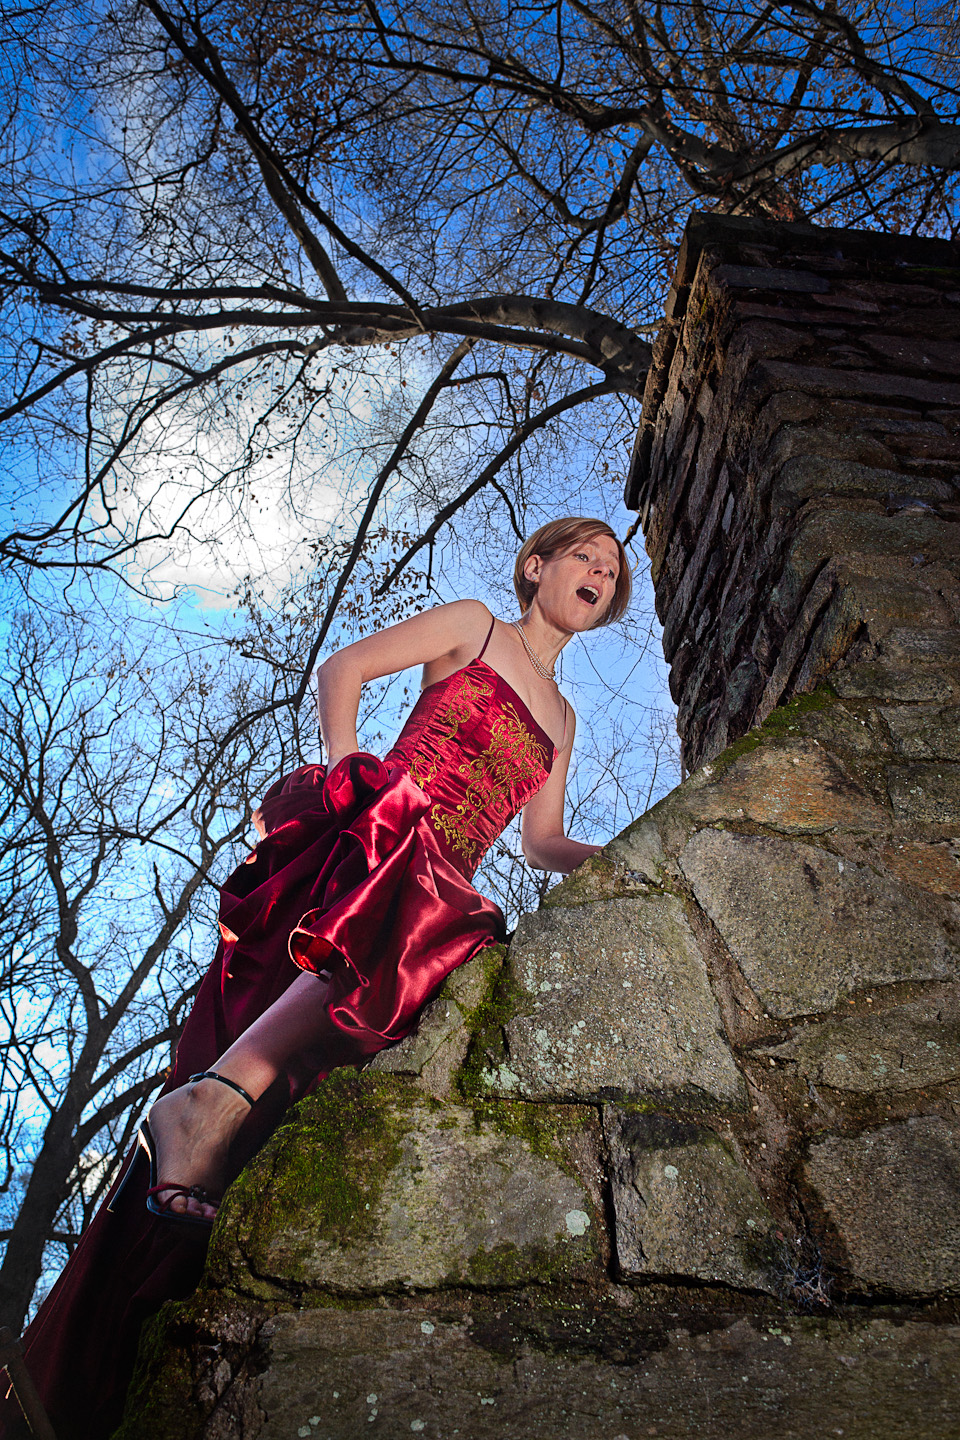
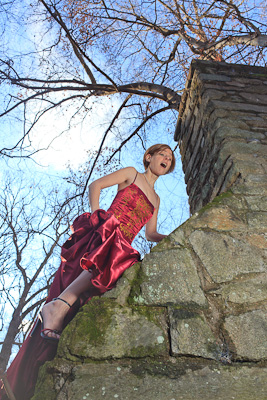
23: Escape
24: Late
As I was down with my family for the holidays in DC, I had a couple volunteers to help me out while I was down there including Adrianne. Who climbed up the chimney of an abandoned picnic house in the woods down the trail of a park near her house. Felt very fairy tale so I thought it would be fun to have her trying to escape her captors and then climbing too high. One speedlight through a diffuser as I recall, camera left aiming up.
My sister and her husband Kevin, who you might remember as the crazy man with the knife in the shot from December 2nd. Since it was Christmas Eve and their 2nd wedding anniversary, I cast them as the wife waiting for her husband who’s late for the party. One speedlight through an umbrella. Composite of two shots to get the expressions right.
25: Together
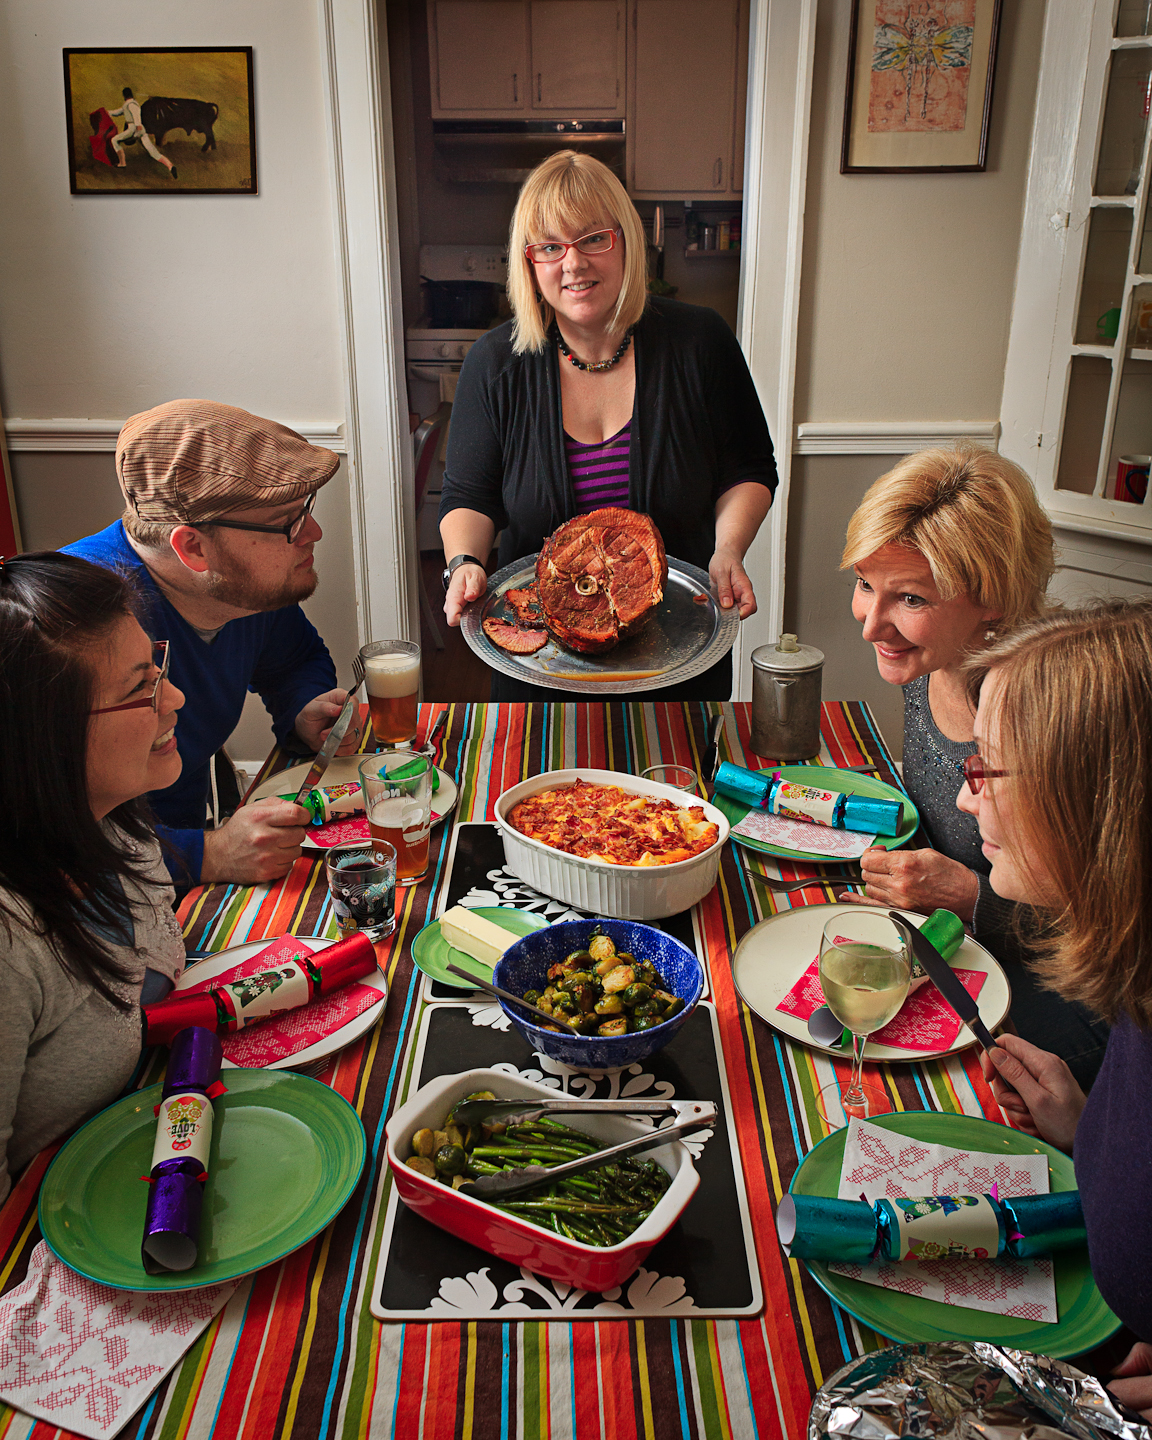
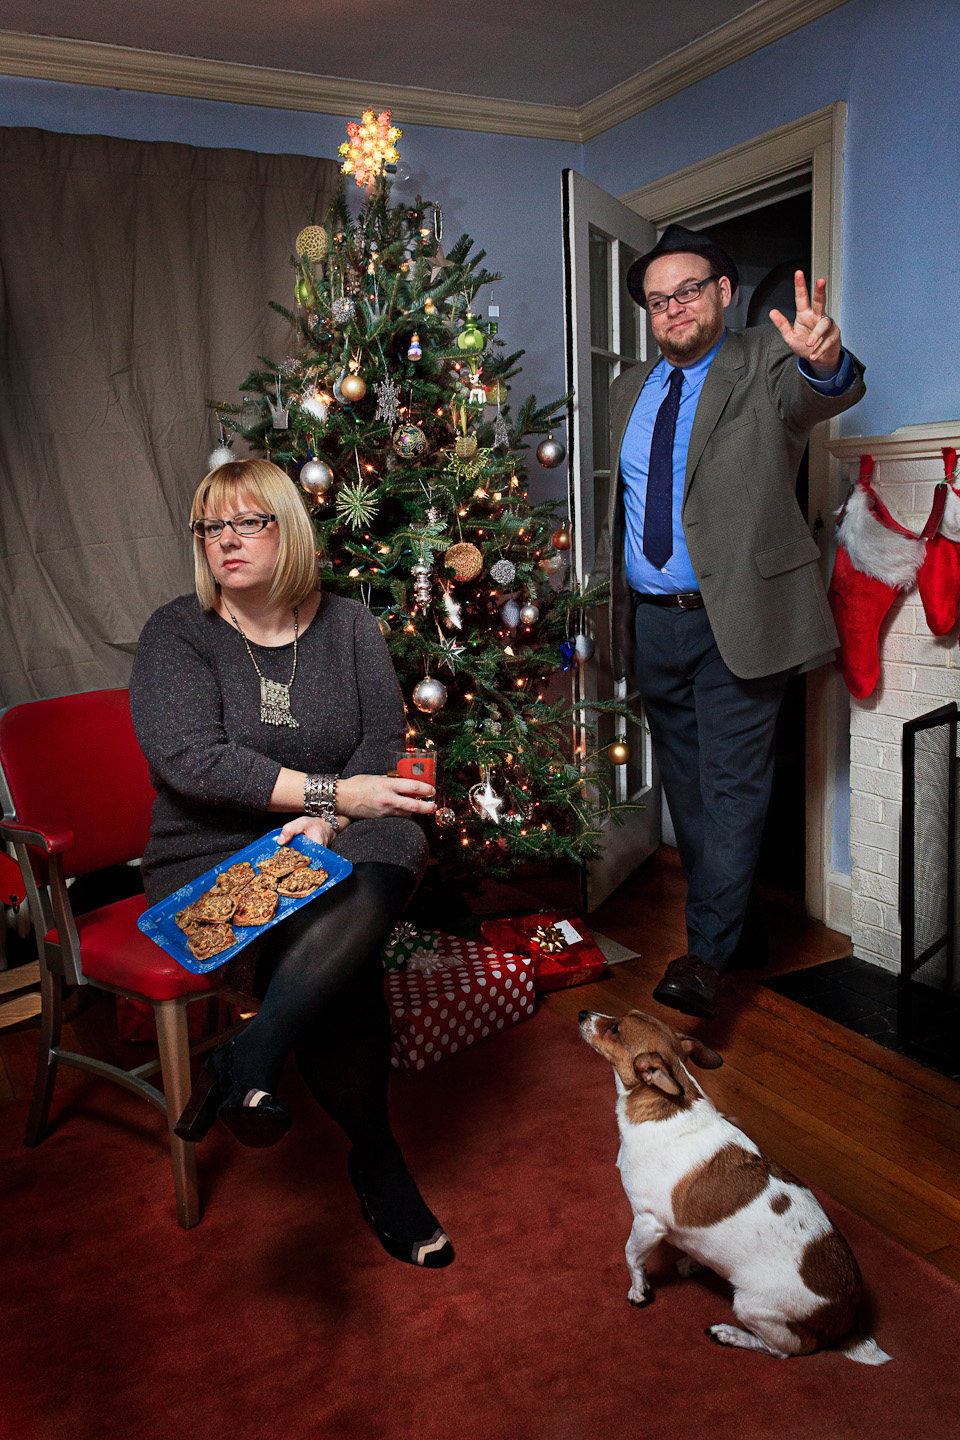
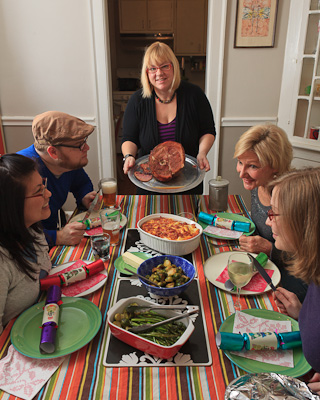
Christmas Day. Perfect time to do an homage to the Rockwell painting of the family at the table. It was dark out by the time we ate though, so light is from a speedlight bouncing off the wall camera left to mimic window light.
26: Espionage
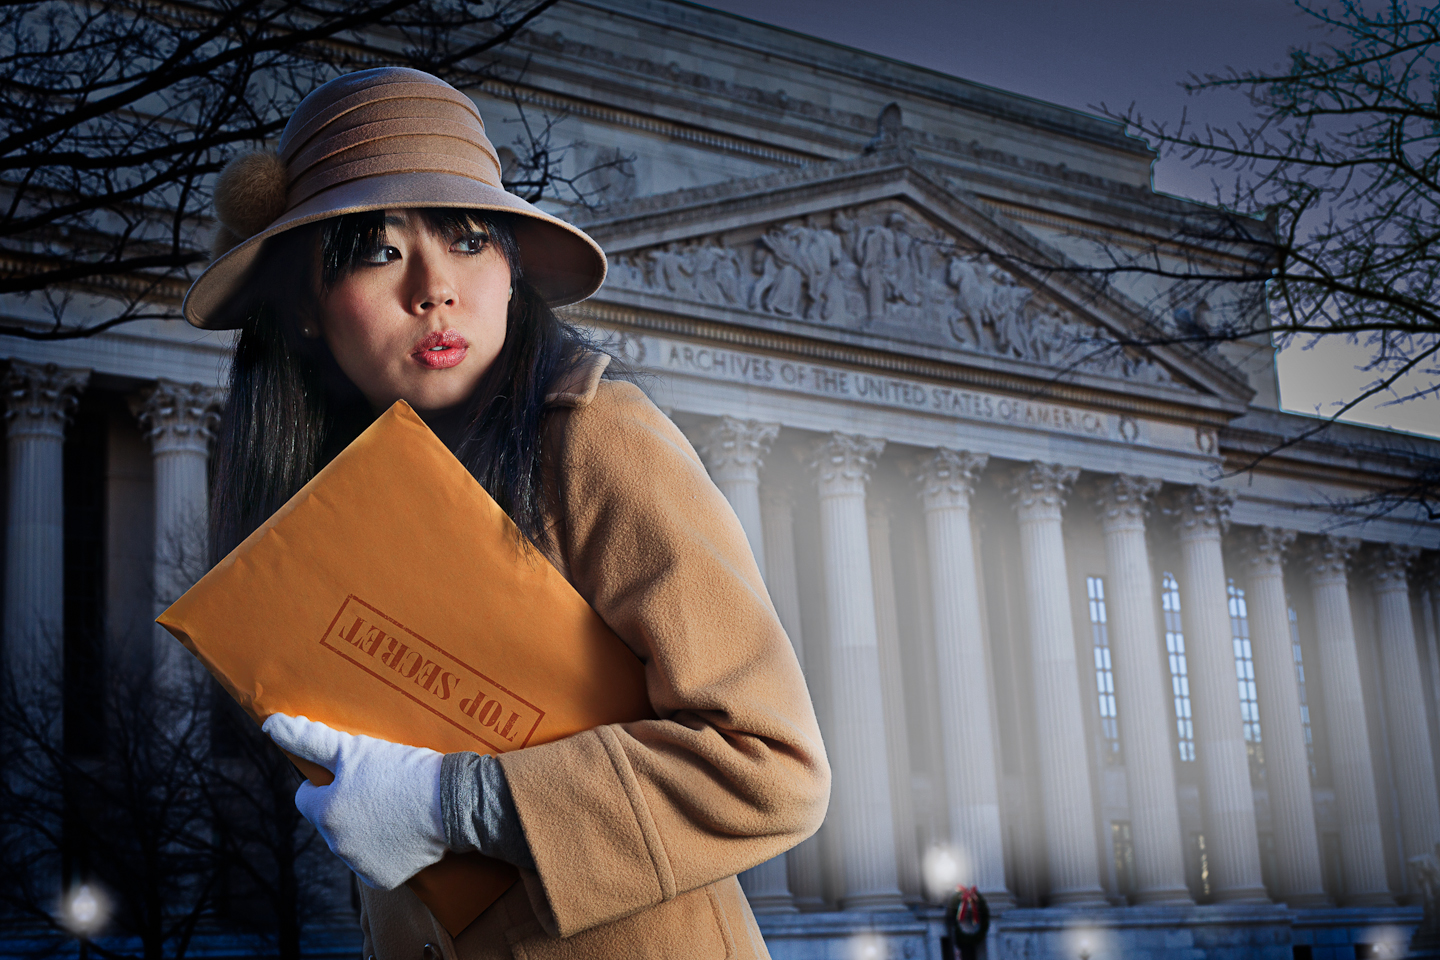
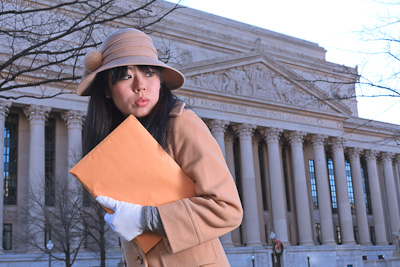
Youri is a friend of mine from NYC who’s family lives in northern VA, so we met up in town and shot her as a spy stealing from the national archives. It’s got a distinctly Boris and Natasha feel, but it was fun. Shot in the daytime with a speedlight through a diffuser to the right. A bit of post to darken the whole thing and make it look more like a headlight on her as well as turn on the streetlights.
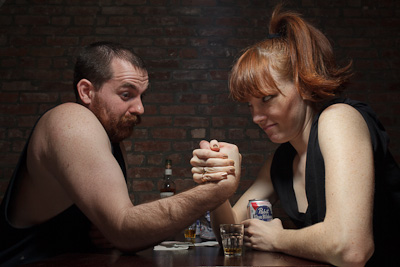
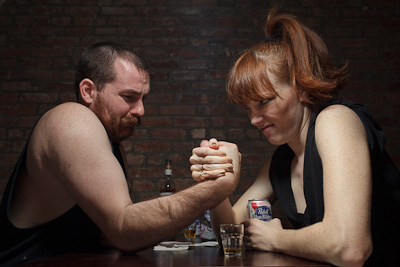
27: Wrestle
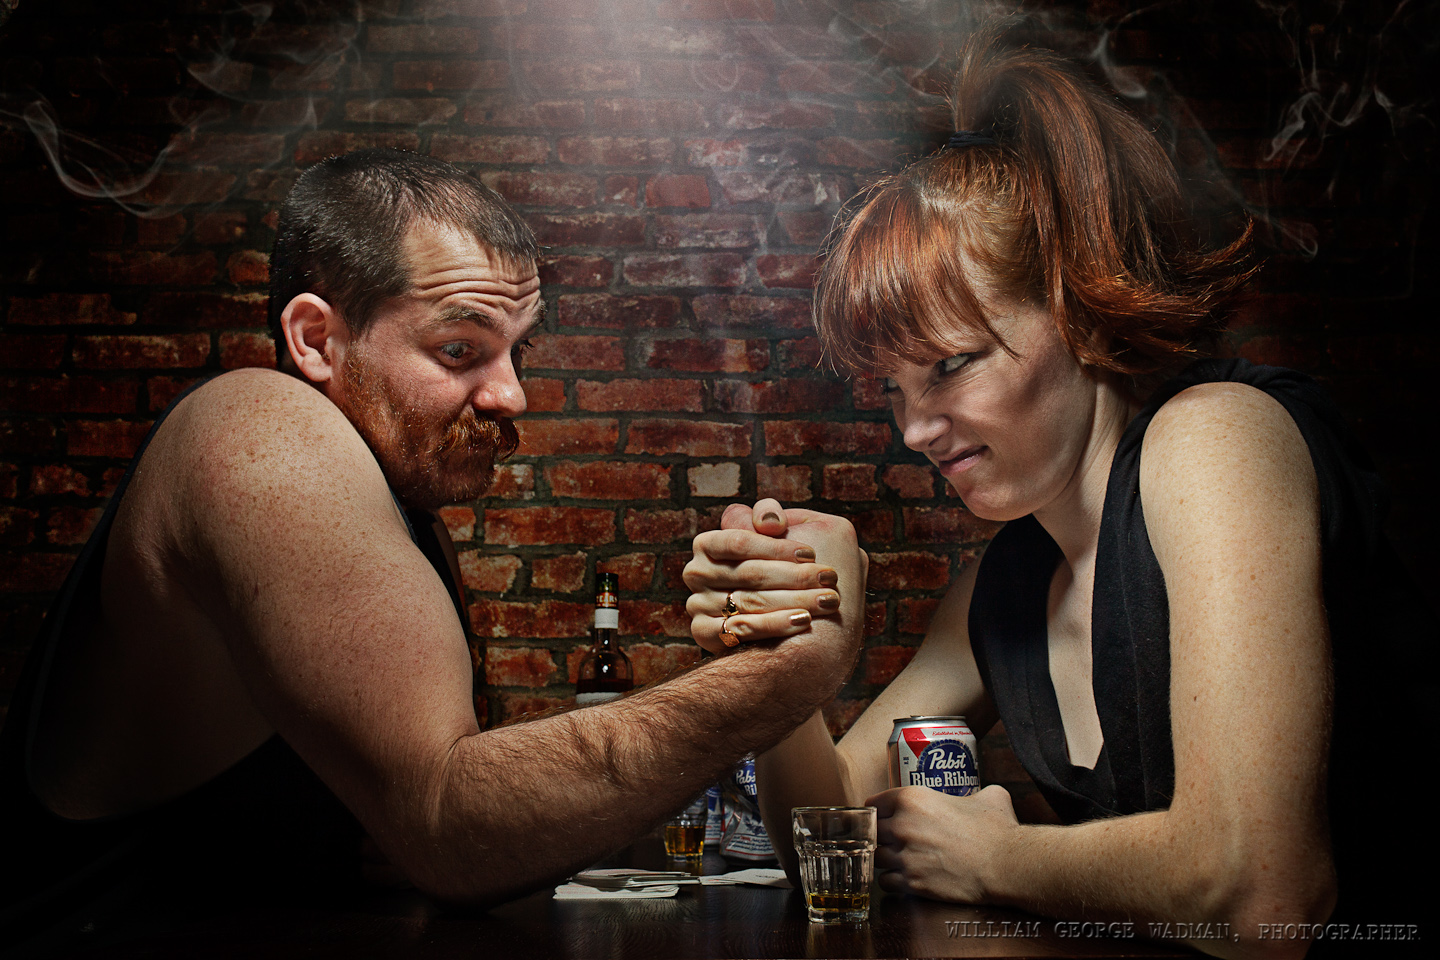
My little redhead friend Mary is always game to take some pictures and had an idea about arm wrestling. Her idea was to be a dame watching two men wrestle, but I thought it would be more fun to have her be one of the contestants. Her mustached friend Tad played a good shill. Held a speedlight with diffusion panel over the two of them with a lightstand and a reflector underneath. Added a little lens flare and stole smoke from the Capcom shot earlier in the month to complete the mood.
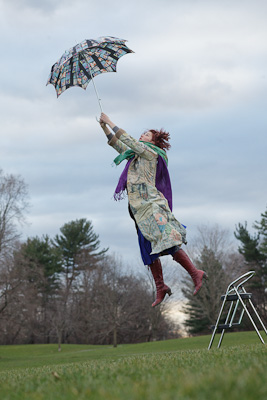
28: Blustery
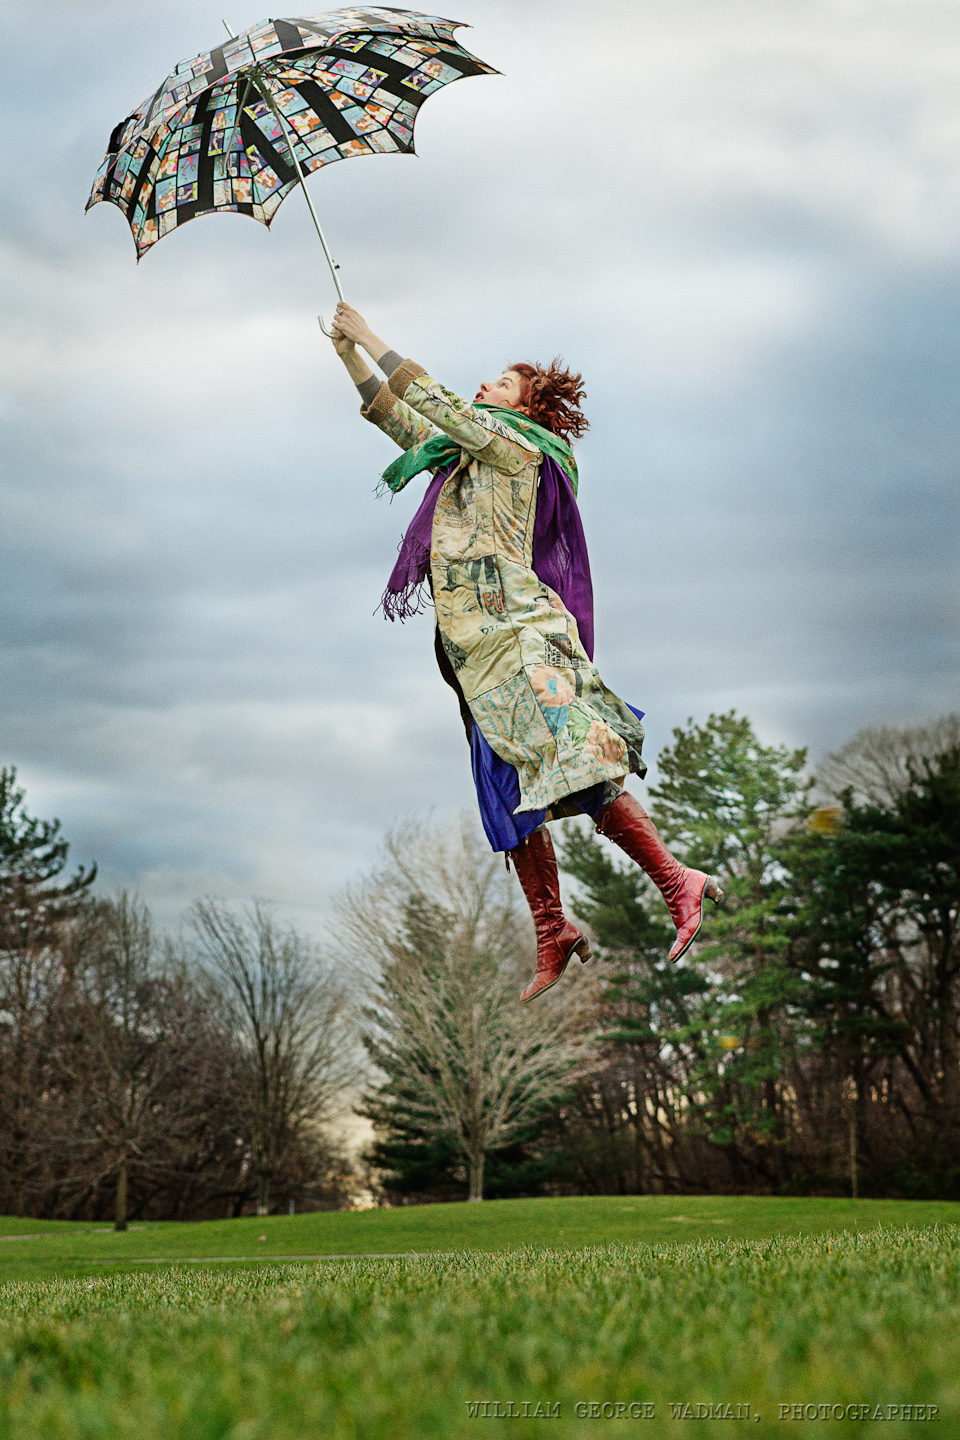
Crazy windy day gave me the idea of having someone actually picked up by their umbrella. Had Annie jump off a foot stool and then later comped her into a plate shot taken a few minutes later. Available light on a cloudy day. Had to shoot at 1600 ISO to get a fast enough shutter speed to catch her in mid air.
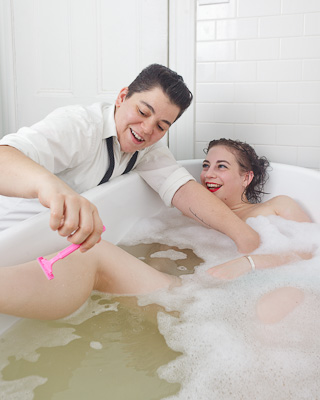
29: Bathe

Zed (the on with the razor) and I talked a few months ago about doing a shot with her washing her girlfriend’s hair in a big old bathtub. My friend Dave has one which I shot him in during my Drabbles series a couple years ago and he kindly volunteered it again. There was windowlight but not quite enough of it for the aperture I needed so I ended up bouncing a speedlight off the ceiling which in a white tile room just bounces it everywhere. Wished that I could have backed up and used a slightly longer lens, but the space is quite cramped so I had to go wide and try to minimize the distortion of the size of her leg for instance. Though I think it makes the razor and her hand more interested and 3D.
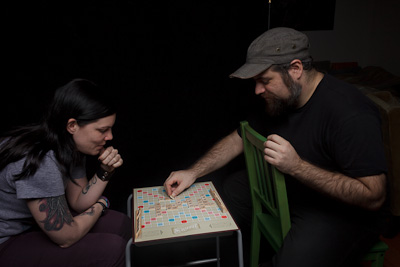
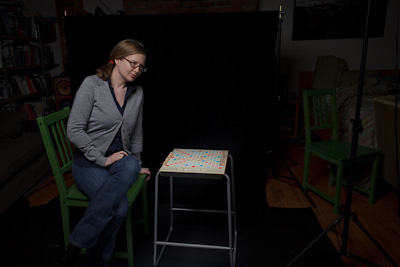
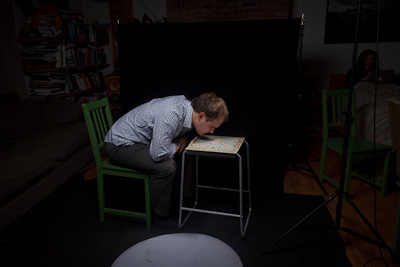
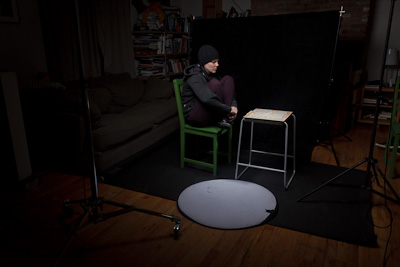
30: Gaming
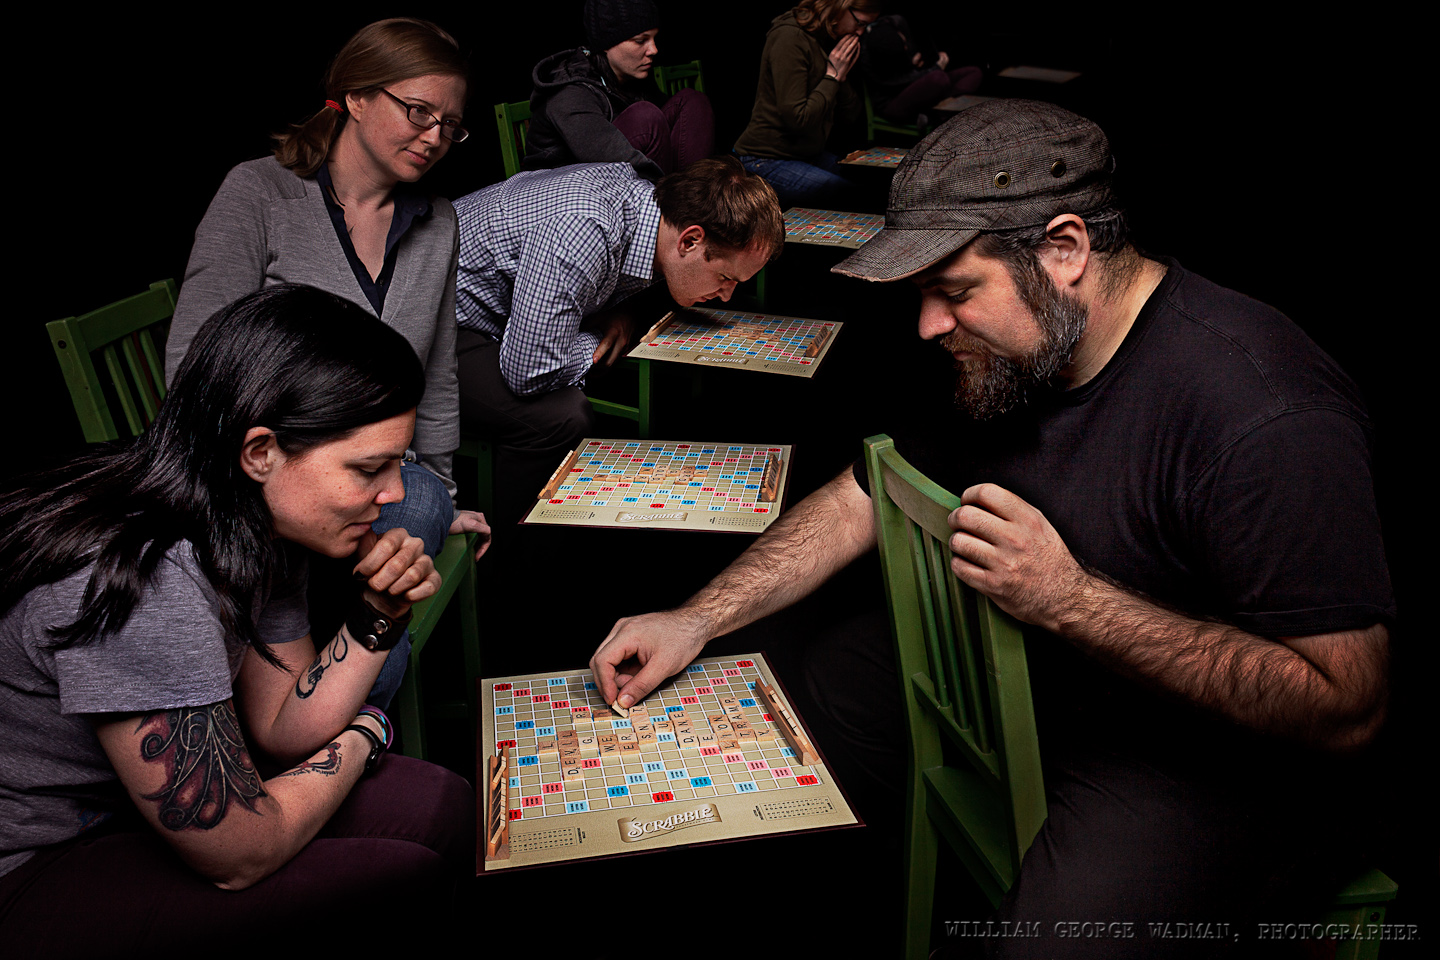
My buddy, frequent assistant, and podcast partner Dan is a Words with Friends nut, and plays with a number of people at any one time. So I thought it would be fun having him playing everyone at once in a virtual blackness. Overhead softbox and additional gridded strobe straight onto the game board. Moved the camera in relation to the board and took several shots which I composited together.
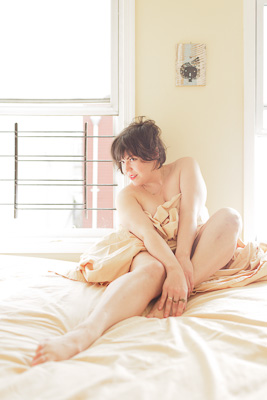
31: Boudoir
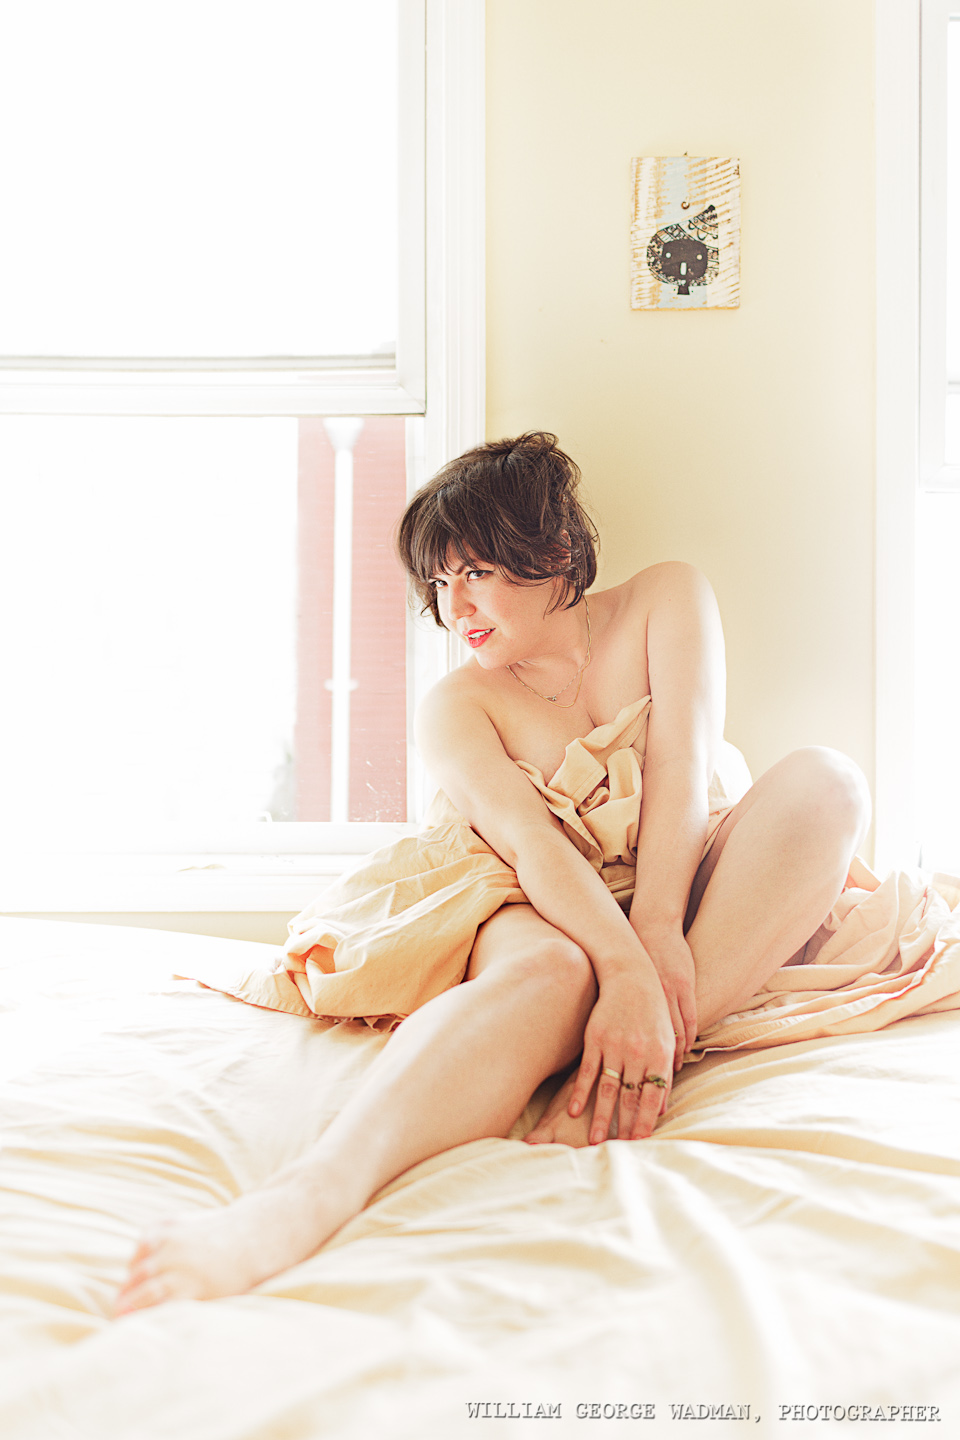
Eleanor is one of my favorite people. So on the morning of New Year’s Eve I went round to her place and spent an hour shooting her rolling around in a sheet on her bed. It’s a tough job people, it really is. I wanted the bright sunlight but wasn’t getting enough so I put a monolight out on her fire escape and then laid a big 4×6′ diffuser right outside the right window, effectively mimicking as much sunlight as I wanted.